Pages

Friday, 15 May 2015

Nearly there.


Living room.  Walls were stripped back to bare stone, one coat lime:sand harled on, 2 coats lime/hemp floated flat, 2 fine coats lime:sand skimmed on, 3 coats limewash, 2 coats clay paint coz limewash wasn't working.
Woodwork is chestnut cut from boards, hand planed and oiled, then sanded to get rid of mouldy bits and re-done.


Bedroom - 4 coats of eco-emulsion on walls, which were sanded, filled, sanded again, washed and rinsed then painted.  Radiators were sanded then primed and given two coats of linseed oil paint that took a week to dry between coats and got everywhere.  Lime/hemp wall on right.  Floorboards gone over by hand with a damp scrubbing brush, then polished with beeswax and orange oil by hand.

Kitchen also done but full of junk, bathroom is still work in progress!

Wednesday, 8 October 2014

September into October. More plaster, more woodwork.

This has been taking a lot longer than I thought.  Been making sills and false lintels for the new windows and front door, then plastering over the lime/hemp.  K has had to sieve sand through mosquito net because we can't find sand fine enough to do it!  Also, due to me having a herniated disc, things have been even slower.  Still, the Screed Men have just left and they're all set to go on Friday.  I'm pointing while they're indoors.  And digging drains (carefully).  And making new boiler house doors.

 Bathroom with slate (dug from the path) and hemp-lime walls.  Going to make a new ceiling because I just do not trust the terracotta brick ceiling that's there already - it's very fragile and I'm not taking a chance.  Laths counter-battened and screwed through the terracotta brick into the joists above, plastered with a very very very very hairy fat lime plaster with some sort of lightweight aggregate.  Maybe vermiculite if I can find fine enough (1mm down) stuff, or maybe not, more'n likely...

 Living room's now done - both walls now plastered.  The walls I did first have now got hairline cracks all over them because the first sand I used was too regular in size.  Hoping a few coats of limewash will hide it...

 Same with the kitchen...

Wood trim to hide crap beam and old wall by stairs.

Found a double sink unit with a double drain board for 20 euros, so things are moving on and up.

Saturday, 2 August 2014

August = woodwork.

Ok, we've had to make some more compromises:

 The floor tiles we bought need to be glued down, so out goes the breathable limecrete floor - we're paying someone to put a cement screed down through the house and then to tile it.  Very disappointed because it was a hell of a lot of hard work to put the lime sub-floor down, but hey, I'll plant some more trees to offset it or something.

Same with the shower.  If you glue tiles onto a wall, the pressure from the shower will force the water behind them and they'll fall off unless you have a waterproof backing.  So we've decided to do a bit of ventilated dry lining around the shower area and clad it with extremely un-ecological polystyrene/cement/resin tilebacker board.  More trees to be planted...

Basically, you have to do one thing or the other.  Old way or new way.  Beautiful, hand-made thick tiles that you can set in mortar that cost a bomb, or cheap(er) tiles that cost half a bomb and need gluing on something made from plastic.  If I was to do this again (which I hope I don't!) I'd buy the real terracotta, the posh wall tiles, a couple of oak trees sawn up into planks first and then worry about the rest of it later.  A handmade terracotta floor or wall would still look good if it was a bit wobbly coz I'd done it but machine-made ones wouldn't and need to be accurate (horrible word) to look good, which needs someone who knows how to do it.

Got some oak windows though, from a father-and-sons workshop locally, made from French oak.  Being French they did what they thought we should have and not actually what we wanted (bare wood) so they're a bit orange from the oil stain, but that'll calm down in a bit.


I'm now cutting down inch-thick planks of chestnut (thought it was oak, but ain't) by hand, joining them by hand, planing them flat and smooth in a rustic charm sort of way by hand, treating them with boron preservative coz I'm not sure about this "tiger oak" wood applying to chestnut and then oiling them with linseed oil a couple of times.  This is for covering the rough ol' oak lintels and making sills.

 The workshop.

 2 inch bit of chestnut with rotten heartwood - I'm using the bit on the right!

2 bits joined with dowels and being planed up. 

 Alcove frame in, new plumber's done the stove properly!

 Boron/oil section.

 Sill trial fit.

 New kitchen window - pentice board's crap and will be re-done, and the window opening to be rendered.  Wall to be limewashed at some point...

Sill being re-built in bathroom, awaiting a nice bit of slate...

And why I've been messing about, K's been doing everything else!

 Polytunnel full of toms.

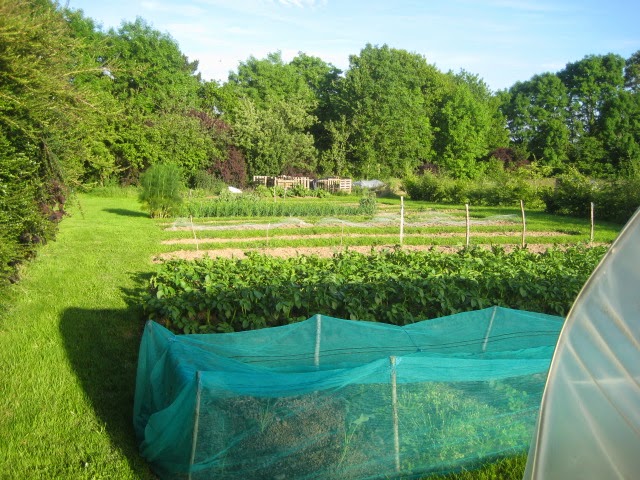
Garden full of veg!

Friday, 6 June 2014

June = plastering.

 Bathroom partition wall re-built with the biggest aerated concrete blocks known to man, and a planed, double mortise and tenoned door frame.

 Top coat done in the bread oven - lime putty/bagged lime/fine sand mix.

 Making a workbench so I can do the woodwork in the house - 2 railway sleepers sawn in half, planed flat (thanks D & R!), and joined with floating tenons drawbored with thick hardwood dowels.  Work in progress.  Very heavy indeed.

 Lime hemp going on - on the right is the first coat, on the left the second.  Will be skimmed with fine plaster when set.

 Bathroom plastering in progress - same recipe as the living room: lime/hemp with fine plaster top coat.  Cracks like buggery, so will have to add more sand and hair next time...

 Kitchen work in progress.  Battens on wall are guides to get the hemp dead flat so we can tile it.

 Back door frame detail: the bottom was rotten so I scarfed a new bit in and re-hung the door.  Glad it fit!

Not sure if I mentioned this before.  Pentice board experiment over the kitchen window, linseed oil mastic to seal the gap.  Works perfectly for 30cm on the end!  Have to re-do it some time...

...and some veggie shots:

 Half a plot this year - no time for runners, etc.

 Toms only in the tunnel.  No melons!

Over-wintered garlic looking good - drying out nicely.

Sunday, 13 April 2014

Halfway house? Nearly halfway...

 Been a while.  Been busy, K's been busy, camera's power switch is buggered so in all, blog updates have been a bit tardy...

 We did have a postage stamp of Complete done, but the stove has to come out again - it's level, which is wrong.  Being open-vented, it traps air in the boiler jacket...

 Bread oven nearly done though.  Plaster coat no.1...

 ... and plaster coat no.2 with red socket box for washing machine.

 Previous owners had covered this window in the larder with plasterboard for no reason I can think of, apart from to make the bread oven behind even darker!

 Bathroom is a bit of a mess... 

 ...so's the plumbing under the bathroom window!  I think the original plumber was looking forward to a plate of spaghetti for lunch and let his stomach control his pipework.

 There will be a bathroom again!  Honest!  The ceiling is individual terracotta bricks, 5cm thick, held in place with plaster of paris and wee hooks.  Why??

 Ex-meter cubby hole, becoming a shower shelf with an ecclesiastical bent.  Umming and ahh-ing about whether to have polished plaster or tiles.

Workbench coming up as soon as the bathroom's back to half-done, then we go back to the front of the house and get plastering, laying floor, making sills, etc, etc.

K's cut 4 cords of wood with a wee hand saw while I've been pottering about in the house!

Oh, and the spuds are in.

Friday, 27 September 2013

Photos for September

 Boiler house re-rendered and top of wall re-built.

 Hearth plastered, awaiting false oak lintel and cover place.

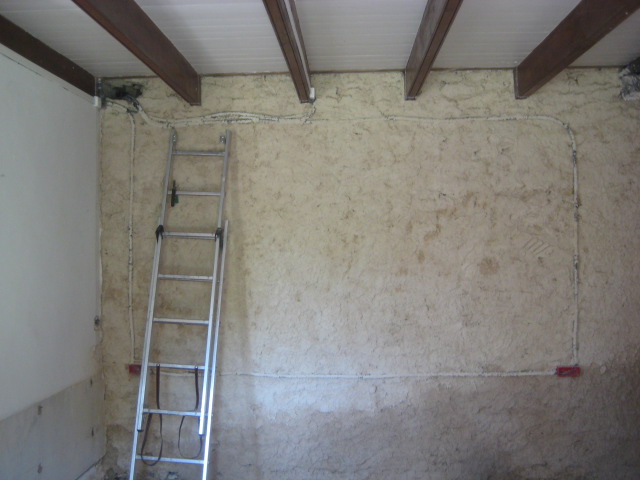
 Conduit tracks in the loft to go over the insulation.

 Loft conversion!  Platform over new joists to take header tanks.
I was a bit toasty doing this!  Bit like working in a sauna for people under 4ft tall while wearing a woolly jumper 10cm thick!

 Trying to hide placcy surface mounting stuff for the lights...
Should be areet when painted.

Removing old steel central heating pipes, copper water pipes and electrical cables to boiler house from spare room, all cemented in together!

Tuesday, 24 September 2013

September = wiring, rebuilding, destruction

The new central heating system comes at the end of the week so the clock's ticking to get as much as possible done for the plumber.  The less he does, the cheaper he is!

So I've been:

Cutting out the old steel heating pipes.  With a junior hacksaw.

Making a conduit track in the loft to keep the wiring above the insulation.

Wiring the upstairs lights.

Re-enforcing (this word is used a lot) the loft so it can take 2 header tanks.  This involved doubling up some of the joists as they were 2x10cm and not very stiff.  Then I made a futon-style platform for the tanks to sit on.  The joists wouldn't fit, so I cut them off at the ends and scarfed them back together, and bolted everything together with massive bolts and massive nails.

Literally re-building the boiler house because the opening is 10cm too small in all directions, and the floor appeared to be made out of fag ash and snail shells, and the walls were not tied in at all.  No good for a ton and a quarter accumulator tank.  One ton of wet crap dug out, one ton of limecrete back in.  I also took out the huge re-enforced concrete lintel, made (reasonably) good the top, re-enforced the wall plate by nailing another wall plate on the back with big nails, stripped the de-laminated cement render off and re-rendered in lime.

Rant alert:

The boiler house has an oak roof and a mahogany door.  House has ice cream wafer -quality pine roof and placcy doors!  Why?!  No footings, just the turf scraped off and house built on top, nice and squidgy.  Top of house has a re-enforced concrete wall plate 20x60 cm cross section, not at all squidgy, built on rubble stone and mud mortar walls, rendered in pure cement.  WHY?

There is no why.  Just get over it and get on chipping that shit off.

Rant over.

Next up is:

Get the hearth plastered and the closure plate made up and put in.  Mock oak lintel in.  Mock lintel, not mock oak.
Make the hearth ventilation neat and central and pretty.  Central will do.  Maybe neat.
Wire the boiler house up.  2 plugs and a light.
Make a door for the boiler house.
Getting some windows in.  Oak, please.
Making a new front door frame.  Oak.
Getting a 250kg stove across a gravel drive and into the house.
Getting a 250kg accumulator tank across a gravel drive and into the boiler house.

Monday, 26 August 2013

Limecrete floors.

I've been making a new floor in the living room.  The old one was oak parquet with dry rot, so out it went and we then needed something to replace it with.  A solid floor sounded good.  We wanted a limecrete floor, and spoke a lot to Mike Wye, who offer a lot of good advice, and I read up about it in various books, read method statements from various companies, etc, etc.

 Work in progress

 Turns out that the aggregate (graded, coated LECA or foamed glass aggregate) used in the UK isn't made here, and to ship it across would be too expensive.  Limecrete floors are done here, but LECA balls are used, like the ones used for hydroponics.  Problem is, this is like making a floor from wee marbles: completely unstable, especially as lime's tensile strength is far too weak - much weaker than cement.  So sod that.

World's biggest rice krispie cake.

What I ended up doing is something a little different.

I used gravel of the same size as the recommended LECA size in the UK to act as a capillary break under the lime slab.  No insulation value, but hey: just wear socks.  Also, the floor of a building tends not to lose as much heat as the rest, so better to spend the cash saved on loft insulation or something.  The gravel was sandwiched between two layers of geotextile membrane to keep it separate from the other layers.  It does roll about a bit - tamping was of no use because the size of the gravel is pretty similar so it doesn't lock together like a graded sub-base normally does.  I guess this is the same for the LECA, so thought it would be ok.  After all, with a ton of lime slab on top, where's it going to go?  Also, there's only two knackered people and a sofa to support...

Actually level! Well, near as dammit..

Next was the limecrete slab.  I stumbled across pumice aggregate, which is used for septic tanks over here.  It's called "pouzollane", which sounded a lot like pozzolan.  Turns out the Romans made stuff with it.  Worked for them, might work for me.  Now, they made things differently to how we do it now.  Basically, they beat lime putty, pozzolan and aggregate together - no mixing as such.  This is also how lime works were done up to the Victorian era - rammed, beaten, etc.  I can't do that, and only have a wee cement mixer.  I need a forced action mixer, but they're very expensive and hard to find here... Also, the pumice was of a different size to the LECA used so I had to work out the mix myself.  Turns out to be what everyone uses anyway - 3 aggregate, 2 sand, 1 binder...

Mixing is hard work: the wee cement mixer only takes 3 bucketloads.  Any more and all you get are maltesers and not concrete.  Also, the pumice sucks water out of the mix, and the sand and lime bind to it, and you get maltesers, not concrete.  Also, the St Astier datasheet on making limecrete says only add one litre of water to 50kgs of lime!  Not enough to even get it damp in my mixer, so after experimenting, I ended up having to use 4 litres per 10kgs of lime!  Not very strong, but the pumice sucked most of that water out and I ended up with a dry-ish mix that just about held together when squeezed.


I then spread a layer of pumice-crete on the floor between already levelled shuttering, and tamp it down with a big bit o' wood.  In 5cm layers.  To level, I alternately scrape a bit with a bit o' wood across the shuttering, and tamp with another bit o' wood, then add a bit more to make it level again, and tamp again.  When it's looking like level, I then go over it again, tamping down hard to compact it until it looks like a Rice Krispie cake.  Then cover and keep damp for 72 hours.  Hard bloody work.  Better work or I'm off to live in a tent.

Job done!

Got to keep off it as long as possible to make sure it's ok - the mix was way too wet to be honest, but it's 10cm deep (twice what St Astier recommend) and it's a living room, not a bloody car-park.  Got a quarter-ton wood stove coming at some point so I'll have to make a wee railway track across it to spread the load!

Sunday, 4 August 2013

August

"They had loads of it here when we first came over, but haven't seen any for a while." said a friend, talking about terracotta floor tiles.  Can get them here but they're fifty euros a metre squared, so that would be 4 grand to do the ground floor.  Also, they look crap!  See below at our sample after I had sealed it.  I guess you have to walk on them for 100 years to get them looking good.  Or buy expensive ones.  Or, as we have, buy ceramic looky-likey for seventeen euros a metre squared and make do.  Also, to keep them looking good and not covered with ground-in muck and cat sick, you wash and oil them every week.  Sod that.


France don't do what everyone else does.  We have decided that concrete is bad as it produces it's own weight in CO2 emmissions.  Lime absorbs CO2.  It's also permeable (ish) so good for damp places like our house.  Which might have a spring under it, meaning I need to investigate and maybe dig a drain in the house.  Everyone who has pioneered limecrete floors recently uses LECA, graded and mis-shapen to provide structural stability.  France has balls of even size, which would be like making a floor out of marbles: prone to movement.  I found the next best thing - pumice.  Should (fingers crossed) have some insulation properties, and it's pozzolanic, meaning it makes the lime stronger.  Worked for Rome...


Also been wiring the house.  Very, very slow work as we can't sink the conduit into the walls: they're only 5cm thick and very brittle so the conduit would almost cut them in half.  I wonder why no-one has thought of this.  So, surface-mounted it is, in wee placcy boxes.  Brittle, expensive, and every shop has not quite what we need, or it's another make of wee box which is 2mm smaller/bigger than the rest on the walls.  Bloody nightmare.  I don't know why it's so cheap and nasty over here - British stuff is so much more solid and half the price!  The other half of the problem is routing it correctly.  For the plugs in the bedroom, it leaves the fusebox, goes up into the roof void, along a frame I had to make to mount the cables properly, through the wall into the living room, up into the bathroom, into a junction box, along and up the a plug in the bathroom, down and through the doorframe, up and around the door, along to the plug on the far side of the room, back to the plug nearest the bathroom door, up and round it again, across to the bedroom door, round the door frame (I replaced the door frame trim with the conduit to try and hide it a bit), along the top of the skirting board and up to the last plug.  Twenty million miles of wee placcy strip for 6 sockets, all mitred by hand, all staggered as per regs, all sank into the plug sockets a wee bit to make it neat.  Good job I'm smacked off my head on Ritalin or I'd be in a madhouse by now.


Yawn.


zzzzzzz.....


Also started plastering.  First coat harled on, next lime-hemp coat splodged on, then battens set up and down the walls as guides, then second lime-hemp coat on, then finishing coat of fine stuff (lime putty, fine sand) on.  Fine stuff is maturing in our old bath for 3 months so it's nice to work with and not shite.


Floor's coming up for the tiling.  We were going to tile on top of the old ones, but that would mean having to use tile adhesive, which is cement, sand and glue to make up for the cement being crap.  Better off using lime and not breathing in glue all day when laying it.


K is working her magic on the radiators.  Rub down, clean with linseed oil soap, prime with linseed oil primer (linseed oil and rust, basically), paint with linseed oil paint (linseed oil and probably graphite powder).  Good fun (K says I talk a lot of bollocks some days), no headaches, natural so no problems with disposal killing fish and that, lasts a long time.


Looking very nice indeed.


Not much going on then... better do some work in the garden as well...