Pages

Friday 27 September 2013

Photos for September

 Boiler house re-rendered and top of wall re-built.

 Hearth plastered, awaiting false oak lintel and cover place.

 Conduit tracks in the loft to go over the insulation.

 Loft conversion!  Platform over new joists to take header tanks.
I was a bit toasty doing this!  Bit like working in a sauna for people under 4ft tall while wearing a woolly jumper 10cm thick!

 Trying to hide placcy surface mounting stuff for the lights...
Should be areet when painted.

Removing old steel central heating pipes, copper water pipes and electrical cables to boiler house from spare room, all cemented in together!

Tuesday 24 September 2013

September = wiring, rebuilding, destruction

The new central heating system comes at the end of the week so the clock's ticking to get as much as possible done for the plumber.  The less he does, the cheaper he is!

So I've been:

Cutting out the old steel heating pipes.  With a junior hacksaw.

Making a conduit track in the loft to keep the wiring above the insulation.

Wiring the upstairs lights.

Re-enforcing (this word is used a lot) the loft so it can take 2 header tanks.  This involved doubling up some of the joists as they were 2x10cm and not very stiff.  Then I made a futon-style platform for the tanks to sit on.  The joists wouldn't fit, so I cut them off at the ends and scarfed them back together, and bolted everything together with massive bolts and massive nails.

Literally re-building the boiler house because the opening is 10cm too small in all directions, and the floor appeared to be made out of fag ash and snail shells, and the walls were not tied in at all.  No good for a ton and a quarter accumulator tank.  One ton of wet crap dug out, one ton of limecrete back in.  I also took out the huge re-enforced concrete lintel, made (reasonably) good the top, re-enforced the wall plate by nailing another wall plate on the back with big nails, stripped the de-laminated cement render off and re-rendered in lime.

Rant alert:

The boiler house has an oak roof and a mahogany door.  House has ice cream wafer -quality pine roof and placcy doors!  Why?!  No footings, just the turf scraped off and house built on top, nice and squidgy.  Top of house has a re-enforced concrete wall plate 20x60 cm cross section, not at all squidgy, built on rubble stone and mud mortar walls, rendered in pure cement.  WHY?

There is no why.  Just get over it and get on chipping that shit off.

Rant over.

Next up is:

Get the hearth plastered and the closure plate made up and put in.  Mock oak lintel in.  Mock lintel, not mock oak.
Make the hearth ventilation neat and central and pretty.  Central will do.  Maybe neat.
Wire the boiler house up.  2 plugs and a light.
Make a door for the boiler house.
Getting some windows in.  Oak, please.
Making a new front door frame.  Oak.
Getting a 250kg stove across a gravel drive and into the house.
Getting a 250kg accumulator tank across a gravel drive and into the boiler house.

Monday 26 August 2013

Limecrete floors.

I've been making a new floor in the living room.  The old one was oak parquet with dry rot, so out it went and we then needed something to replace it with.  A solid floor sounded good.  We wanted a limecrete floor, and spoke a lot to Mike Wye, who offer a lot of good advice, and I read up about it in various books, read method statements from various companies, etc, etc.
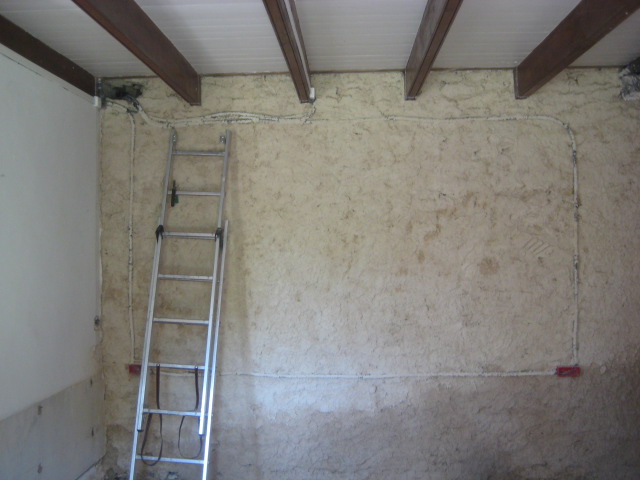
 Work in progress

 Turns out that the aggregate (graded, coated LECA or foamed glass aggregate) used in the UK isn't made here, and to ship it across would be too expensive.  Limecrete floors are done here, but LECA balls are used, like the ones used for hydroponics.  Problem is, this is like making a floor from wee marbles: completely unstable, especially as lime's tensile strength is far too weak - much weaker than cement.  So sod that.

World's biggest rice krispie cake.

What I ended up doing is something a little different.

I used gravel of the same size as the recommended LECA size in the UK to act as a capillary break under the lime slab.  No insulation value, but hey: just wear socks.  Also, the floor of a building tends not to lose as much heat as the rest, so better to spend the cash saved on loft insulation or something.  The gravel was sandwiched between two layers of geotextile membrane to keep it separate from the other layers.  It does roll about a bit - tamping was of no use because the size of the gravel is pretty similar so it doesn't lock together like a graded sub-base normally does.  I guess this is the same for the LECA, so thought it would be ok.  After all, with a ton of lime slab on top, where's it going to go?  Also, there's only two knackered people and a sofa to support...

Actually level! Well, near as dammit..

Next was the limecrete slab.  I stumbled across pumice aggregate, which is used for septic tanks over here.  It's called "pouzollane", which sounded a lot like pozzolan.  Turns out the Romans made stuff with it.  Worked for them, might work for me.  Now, they made things differently to how we do it now.  Basically, they beat lime putty, pozzolan and aggregate together - no mixing as such.  This is also how lime works were done up to the Victorian era - rammed, beaten, etc.  I can't do that, and only have a wee cement mixer.  I need a forced action mixer, but they're very expensive and hard to find here... Also, the pumice was of a different size to the LECA used so I had to work out the mix myself.  Turns out to be what everyone uses anyway - 3 aggregate, 2 sand, 1 binder...

Mixing is hard work: the wee cement mixer only takes 3 bucketloads.  Any more and all you get are maltesers and not concrete.  Also, the pumice sucks water out of the mix, and the sand and lime bind to it, and you get maltesers, not concrete.  Also, the St Astier datasheet on making limecrete says only add one litre of water to 50kgs of lime!  Not enough to even get it damp in my mixer, so after experimenting, I ended up having to use 4 litres per 10kgs of lime!  Not very strong, but the pumice sucked most of that water out and I ended up with a dry-ish mix that just about held together when squeezed.


I then spread a layer of pumice-crete on the floor between already levelled shuttering, and tamp it down with a big bit o' wood.  In 5cm layers.  To level, I alternately scrape a bit with a bit o' wood across the shuttering, and tamp with another bit o' wood, then add a bit more to make it level again, and tamp again.  When it's looking like level, I then go over it again, tamping down hard to compact it until it looks like a Rice Krispie cake.  Then cover and keep damp for 72 hours.  Hard bloody work.  Better work or I'm off to live in a tent.

Job done!

Got to keep off it as long as possible to make sure it's ok - the mix was way too wet to be honest, but it's 10cm deep (twice what St Astier recommend) and it's a living room, not a bloody car-park.  Got a quarter-ton wood stove coming at some point so I'll have to make a wee railway track across it to spread the load!

Sunday 4 August 2013

August

"They had loads of it here when we first came over, but haven't seen any for a while." said a friend, talking about terracotta floor tiles.  Can get them here but they're fifty euros a metre squared, so that would be 4 grand to do the ground floor.  Also, they look crap!  See below at our sample after I had sealed it.  I guess you have to walk on them for 100 years to get them looking good.  Or buy expensive ones.  Or, as we have, buy ceramic looky-likey for seventeen euros a metre squared and make do.  Also, to keep them looking good and not covered with ground-in muck and cat sick, you wash and oil them every week.  Sod that.


France don't do what everyone else does.  We have decided that concrete is bad as it produces it's own weight in CO2 emmissions.  Lime absorbs CO2.  It's also permeable (ish) so good for damp places like our house.  Which might have a spring under it, meaning I need to investigate and maybe dig a drain in the house.  Everyone who has pioneered limecrete floors recently uses LECA, graded and mis-shapen to provide structural stability.  France has balls of even size, which would be like making a floor out of marbles: prone to movement.  I found the next best thing - pumice.  Should (fingers crossed) have some insulation properties, and it's pozzolanic, meaning it makes the lime stronger.  Worked for Rome...


Also been wiring the house.  Very, very slow work as we can't sink the conduit into the walls: they're only 5cm thick and very brittle so the conduit would almost cut them in half.  I wonder why no-one has thought of this.  So, surface-mounted it is, in wee placcy boxes.  Brittle, expensive, and every shop has not quite what we need, or it's another make of wee box which is 2mm smaller/bigger than the rest on the walls.  Bloody nightmare.  I don't know why it's so cheap and nasty over here - British stuff is so much more solid and half the price!  The other half of the problem is routing it correctly.  For the plugs in the bedroom, it leaves the fusebox, goes up into the roof void, along a frame I had to make to mount the cables properly, through the wall into the living room, up into the bathroom, into a junction box, along and up the a plug in the bathroom, down and through the doorframe, up and around the door, along to the plug on the far side of the room, back to the plug nearest the bathroom door, up and round it again, across to the bedroom door, round the door frame (I replaced the door frame trim with the conduit to try and hide it a bit), along the top of the skirting board and up to the last plug.  Twenty million miles of wee placcy strip for 6 sockets, all mitred by hand, all staggered as per regs, all sank into the plug sockets a wee bit to make it neat.  Good job I'm smacked off my head on Ritalin or I'd be in a madhouse by now.


Yawn.


zzzzzzz.....


Also started plastering.  First coat harled on, next lime-hemp coat splodged on, then battens set up and down the walls as guides, then second lime-hemp coat on, then finishing coat of fine stuff (lime putty, fine sand) on.  Fine stuff is maturing in our old bath for 3 months so it's nice to work with and not shite.


Floor's coming up for the tiling.  We were going to tile on top of the old ones, but that would mean having to use tile adhesive, which is cement, sand and glue to make up for the cement being crap.  Better off using lime and not breathing in glue all day when laying it.


K is working her magic on the radiators.  Rub down, clean with linseed oil soap, prime with linseed oil primer (linseed oil and rust, basically), paint with linseed oil paint (linseed oil and probably graphite powder).  Good fun (K says I talk a lot of bollocks some days), no headaches, natural so no problems with disposal killing fish and that, lasts a long time.


Looking very nice indeed.


Not much going on then... better do some work in the garden as well...

Monday 24 June 2013

Fireplace done.

I wish I was getting paid by the hour for this.  By a er, be about 30 quid richer.  Still, that's 120 bottles of home brew.


Voila.  One massive fireplace in a wee room.  Very, very hard to do - as I got to the top it was getting nigh on impossible to back-fill and get the side of the flue straight, and tie in everything.  Got there in the end.

The back was black with soot so after a bit of research, cow poo came to the rescue.  There are lots of different ratios, but basically, cow poo has a mucus in it that reacts with lime to form a gel that keeps soot and tar from leaching through plaster, staining it.  Also flexible and fire-proof, so good for chimneys.  My French wasn't up to explaining that to our neighbour, so  they are ...bemused, thinking I'm spraying my house with cow shit.  Which I am.  Sand, lime, poo and hair mixed to a slurry and harled on the back.  Got some in my mouth.  Tastes like shit.

Next on the list - a bloody concrete slab.  Rather have lime-crete, but we're not made of money.  Better plant more trees this winter to offset it.

Friday 21 June 2013

Fireplace update.

Moved the very heavy concrete lintel into place, possibly like the Easter Islanders did their big rocks: with rollers and wee bits of wood.  If you have two supports near enough to the centre so it see-saws a bit, you can lift one end with one hand, put a taller bit of wood in, rock it back, do the other side, and voila - it's higher and your spine discs are still where they should be.  Got help to put it in but it wasn't sitting right so I rocked one side out on an accro prop, fiddled about at the back, re-mortared and rocked it back again, then repeated for the other side.  All level and square and plumb and all those other words the original builders were not aware of!  I wish I'd built the hearth out a bit, then I could have had a bit of oak as a lintel but didn't think of that until too late!  Can't have a wood lintel flush with the wall as it would be too close to the flue and would burn, hence concrete... Still, it'll look good - if I ever finish it!


The next thing is to support the middle of the wall, between the lintel and the back, outer wall.  I was advised to cast concrete in with some shuttering, but after fiddling about I worked out that this will only work for square spaces and I wasn't about to spend a week scribing wood to fit the wall (the concrete would seep out of any gaps).  So, once again, simpler solutions work: a big stone acting like a bridge from the lintel, through the back wall.  Took minutes as opposed to hours fiddling about with moulds and casting concrete.  Also a lot better for the planet, like.  I had stone, and lime mortar in me bucket.  Job done.


We have also been wiring the house in our spare time.  Not as hard as everyone thinks.  Wires go from fusebox, along wall to socket and back again.  Earth wires go to the earth - a copper spike in the ground.  Bit hard to get everything level due to the crumbling stone and mud walls, but near as can be.


Saturday 1 June 2013

Summer update

We're living in the gite for the foreseeable future.  Very glad it's not a caravan!

 Been doing various very dull and longer-than-I-thought-it-would-take jobs, like doing the drain properly.

 The original Breton fireplace was taken out in the 60s and a small coal grate was put in.  I have taken the small coal grate out and am putting a Breton fireplace back in!  We're getting a woodburner with backboiler and want something nice for it to stand on.  Took forever to do the hearth, but pleased with how it's going so far.  Dead level as well, for once!


Also re-enforced a rotten roof timber by putting a new one in front and screwing it in.  Nice bit of planed and oiled oak, which will be showing in the bedroom after the wall's been re-plastered.

Also working on the electrics and have been planing some oak posts to hold up a possibly supporting wall that has been knocked through to make the living room bigger.

Monday 28 January 2013

More rot and dust and damp...

Ok, nearly there in the demolition stage for the front of the house.  Bit of a delay due to general procrastination, wet weather, flu, christmas, etc....


The drain I put in last year is no good - it's too far from the house and the wrong type.  I thought the damp issue would be solved along the kitchen wall by draining the sub-soil so I dug a sub-soil drain 2 metres from the wall so it would run just in front of the then existing bread oven.  Trouble is, it's surface water that's the problem!  So I dug another one and am making a path along the side of the house to get rid of the strip of grass that is a pain to mow.


Inside, downstairs is done apart from a huge bit of wood in the kitchen which is near impossible to get out, so I have moved upstairs.  Our bedroom was dry-lined on the gable end wall, so off with it to see why it's there and what it's covering.  It was covering a dry cement wall, painted French Weird Cream.  My theory is that the cement and paint made an impervious covering to a cold wall, which meant water vapour from sleeping old people condensed on it overnight and it went black with mould.  My solution: off with the cement, re-plaster with lime and hemp, leave an open texture.  This will be slightly insulating and the open texture will mean a large surface area to absorb vapour so it doesn't run down the walls.  Lime being naturally sterilising will hopefully help with mould problems as well.


So why remove the back bit as well then?  There was a crack in the back wall, about 1mm wide, so I thought I'd take the plaster off to see what the wall looked like.  Looked fine, but then I reckoned that I'd might as well take the rest off and lime-hemp that as well, and found a rotten roof timber.  Serves me right.  

It took a bit of looking at the wall and the roof from both sides, measuring and guessing to work out that it's built like our barn: the rotten bit takes the thrust of the roof away from the top of the wall where it could push the wall over, further down and more vertical.  

Ahhh, good ol' Paint...  Not sure how to fix it though: it's 6 by 12 cms and nailed in with big nails.  I'd have to remove a lot of stone to get at it.  A friend has suggested putting a big metal bar through the remaining wood to hold it all together and then filling the hole with concrete.  Might do, and stitch the gap across as well with something.

Also got a potential problem with the fireplace being too small but I'll save that one for later.